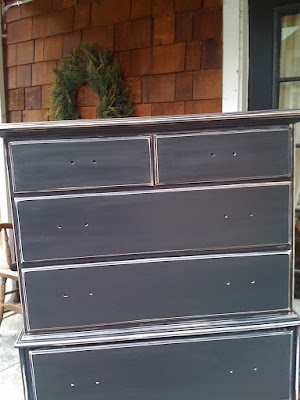
Darn it. I had a picture of this dresser before I painted it and now that I want to post it, I can't find that. So, you are just going to have to use your imagination! Plain, ugly, wood dresser that had good "bones"
Do you have the picture in your head? OK, good. Here's the deal. My husband begged me for a long time for a dresser of his own. It seems the closet was being taken over by moi! No? Really?
Anyway, I went out one day to find a inexpensive black dresser that would match the other furniture in our room. The only one I found for a fairly reasonable price was at Target for $300.00.
 I bought it while the hubby was at work and was determined to have it put together when he got home. Well, it was sort of like putting together something from Ikea. Ever had the pleasure of doing that? I got it together but after a few weeks the drawer fronts started to fall off.
 Fast forward a couple months (and a couple missing drawer fronts later) I spotted a dresser at the Goodwill that was solid wood and had plenty of storage, a good shape to it, the perfect measurements (remember to always carry that tape measure and measurements)
So, I picked it up. $29.00! Yep, you heard me right, $29.00!
So starts the story on how to re-do a dresser.....
I first sanded down the whole thing with my palm sander. Then I coated it with a tinted primer. It's important to use a tinted primer when you are doing a dark color like black. I had some left over from doing my interior doors.
 You can be sloppy with it. After all, it is a base coat. Make sure you sand it down really well though to take any grime, grease, or varnish it may have on it off.
Let dry.

Paint on the black or whatever color you are doing. I like to use those inexpensive foam brushes. They don't leave brush stroke marks and if you put them in a Ziploc in the fridge, you can use them over and over again. I did 3 coats of black letting it dry in between coats.

Then, using my palm sander again, I distressed the edges. When distressing you want to only hit spots that wear would normally occur over time, like the edges, or around knobs, handles.

You can "age" it to whatever your taste is. Go over it again and again until you get the look you desire.


0 comments:
Post a Comment