But with a price tag of $1195.00, it's definitely out of my budget. Granted, it is 5', but still.....
Here is what the clock looks like on their website.

Here is how I made mine. Maybe you can get some inspiration from this to make one for yourself too!
I started with this clock from Joss and Main.
If you aren't familiar with Joss and Main, you need to be :)
Items are only available for a short time, but the prices are way cheap and the shipping is usually free.

The first thing I did was to take it apart.
Then I painted the whole background white.

While that was drying, I printed out a photo of the clock off the Restoration Hardware site. I then measured the circumference of my clock which was 24". I took the printed paper to Kinkos and enlarged it to 24". When I got home I turned my "metal" piece of the clock over and traced on very lightly where the dividing lines would go.

Then I cut out each roman numeral and scribbled pencil all over the backside of the paper.
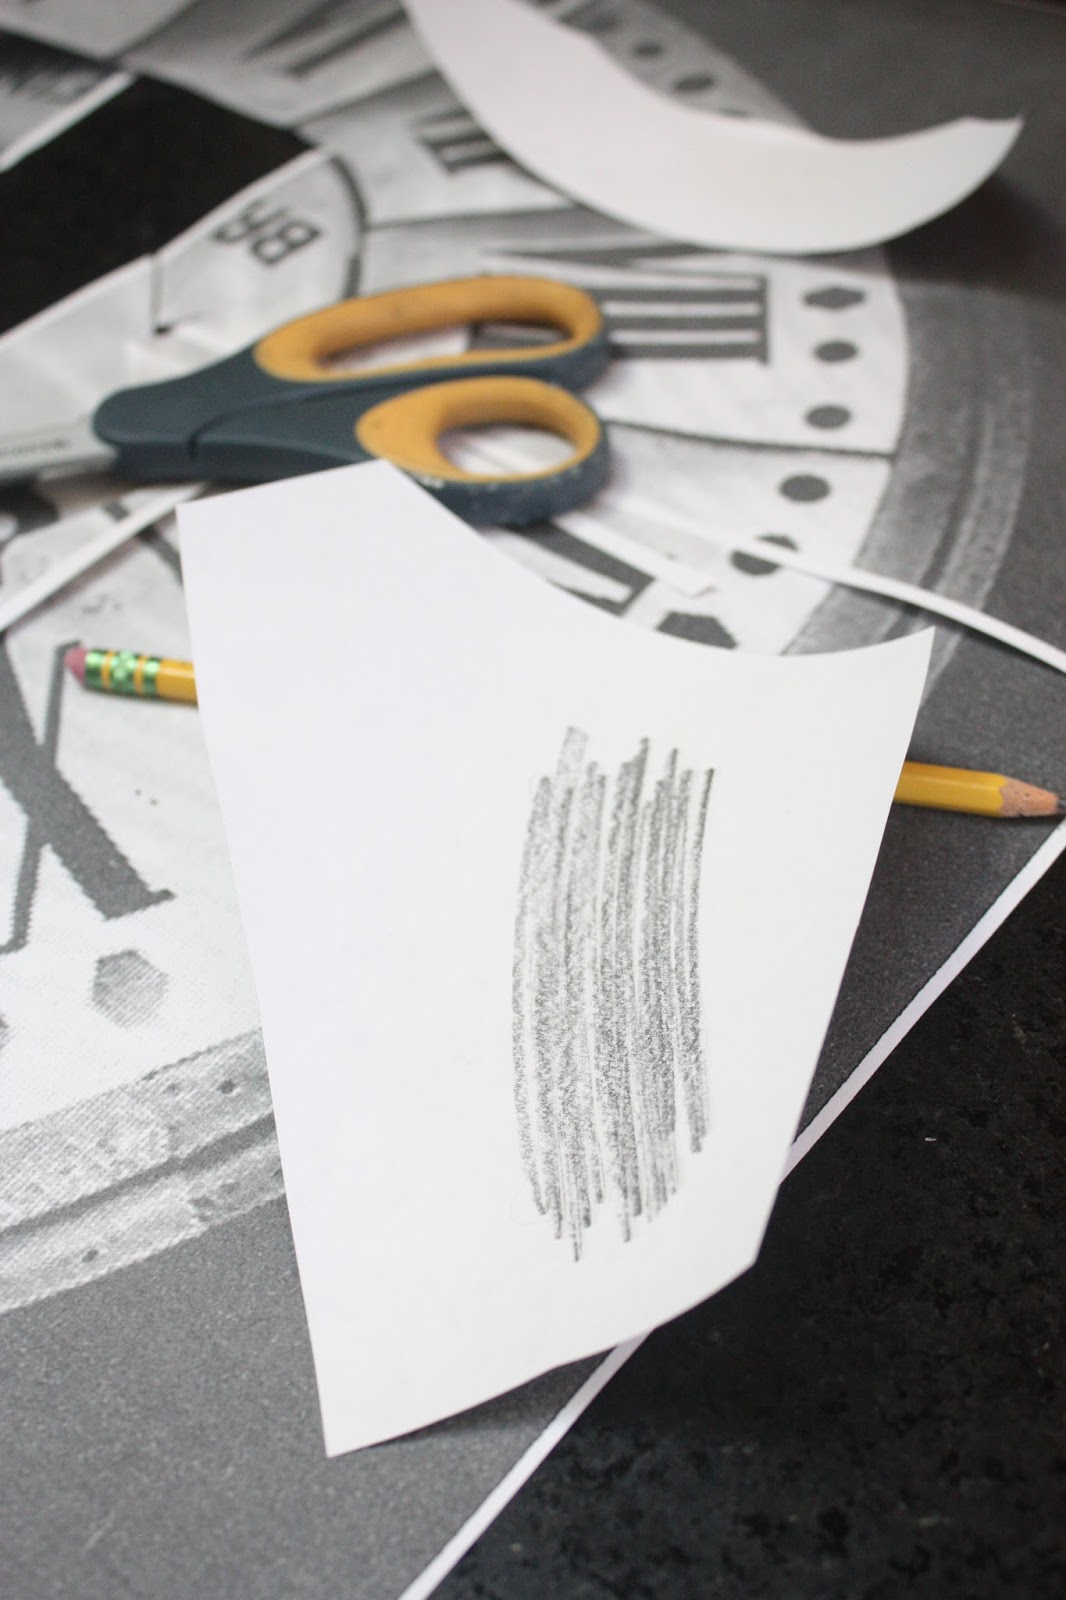
Position your "patterns" or roman numerals onto the clock face in between the lines you just traced. Tape on with painters tape and trace over the outline of your roman numerals with ballpoint pen. This will transfer the pencil to the white painted surface. Do this with the lettering as well, then discard all your paper.

Now that the pencil pattern is on your clock face you can use a fine brush and black acrylic paint to fill it in.

The Restoration Hardware clock had dots around the border, so I did those as well using a pencil eraser and the same black paint.

After the black paint is dry, distress it lightly with sandpaper and seal with clear wax. I like Annie Sloan clear wax.
Next came the metal frame. The original looked more grey than my Joss and Main one did, so I gave it a little faux zinc treatment like I did here.
Basically I just dry brushed on 2 colors of paint, dark grey and silver. In this case I used Martha Stewart Arrowhead and Sterling.

After putting it all back together, I realized how tiny the clock hands looked compared to the RH one. So, I used my little pea brain and came up with a idea to make new clock hands.
I headed to the pantry and emptied out a box of nutra grain bars. Then I traced on some larger looking clock hands and cut them out. {I just googled clock hands under images until I found some I liked}

I painted them black and added them to the top of the existing ones with a little glue.
Ready to see the finished product? First, lets take one more look at the $1195.00 version:

And, here is my $47.00 version!
I am so happy to have saved $1148.00!!!


What do you think? Pretty close huh?
xoxo


0 comments:
Post a Comment